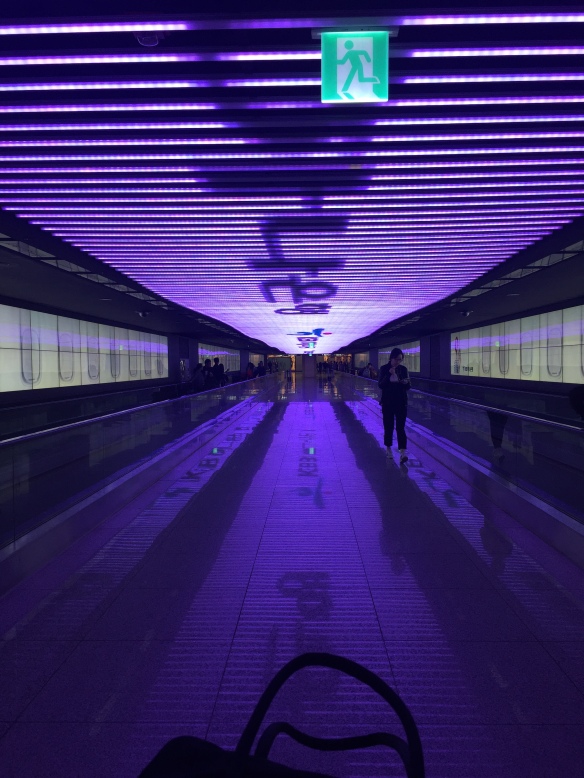
Korean Street Food

image

Incheon: Seoul

I visit South Korea always in winter, never in the hellish summer heat and humidity, which I avoid at all cost. This year I went in March (late winter) instead of January (deep winter) and I could deal with that type of cold much better. Our South African winter this year is colder than normal, or so it feels to me at least and today I miss the Korean street food which is fascinating and delicious. My favourite place in Ulsan is stricly speaking not on the street but rather a “hole in the wall”‘type of place with limited seating, so eating standing around huddled together in the cold is just the thing! The tempura fried vegetables are served with a rice vinegar dipping sauce.

image

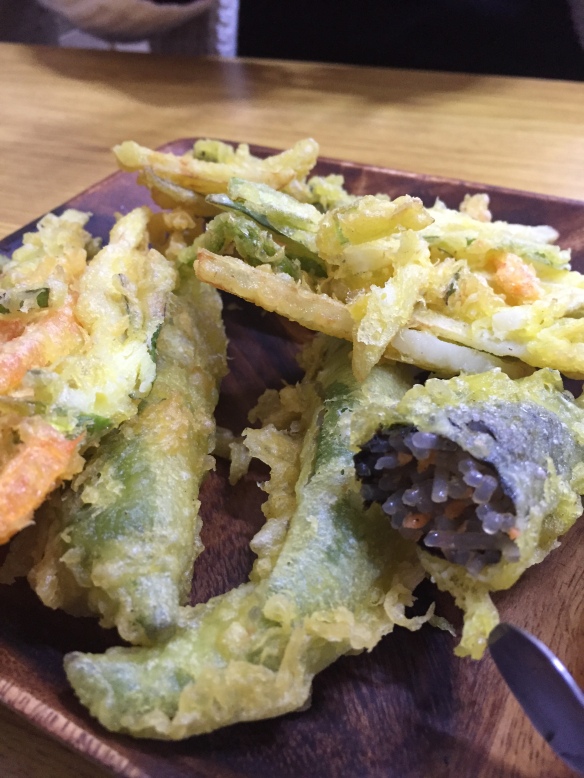
Vegetable tempura and glass noodle roll.

Tempura Vegetables

Tempura Vegetables

In Seoul the street vendors are lined up one after the other and walking around, tasting and eating from one vendor to the next with a spot of shopping inbetween is a nightly pass time, which I embraced whole heartedly if my bank balance was anything to go by…

Vibrant candy floss!

Vibrant candy floss!

Strawberries dipped in chocolate

Strawberries dipped in chocolate

Street food Seoul

Street food Seoul

I absolutely LOVE the traditional Bibimbab which is not street food but my favourite sit-down Korean meal. There are always a million and ten side dishes of all sorts of soups, pickles and kimchi of course. The main dish is served in a piping hot bowl and consists mainly of rice, root like “things” and vegetables, meat is optional. The raw egg comes on top and you then fry your own dish in the piping hot bowl with a mild chilly sauce. Oh the joy!

Vegetarian Bibimbab

Vegetarian Bibimbab

Pickles&Kimchi

Pickles&Kimchi

Street Scenes and goodbyes:

image

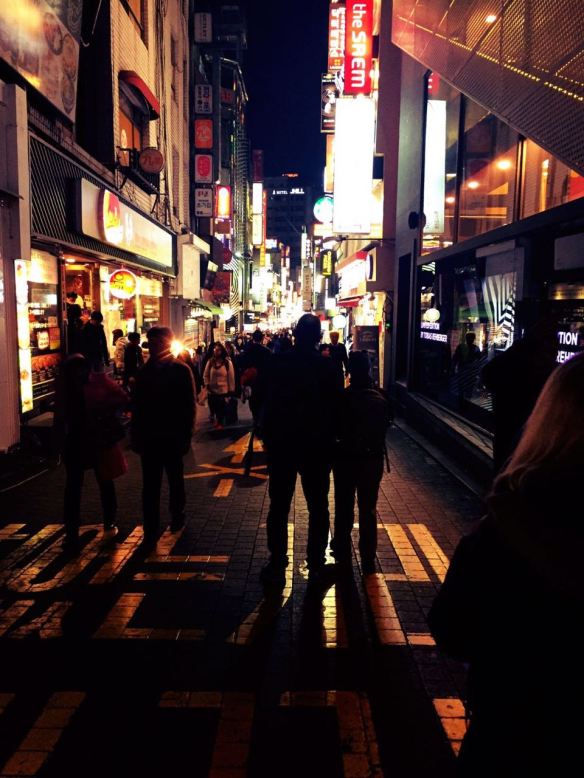
Seoul at night: photo Tara

Why do I always have to leave her behind…..

image

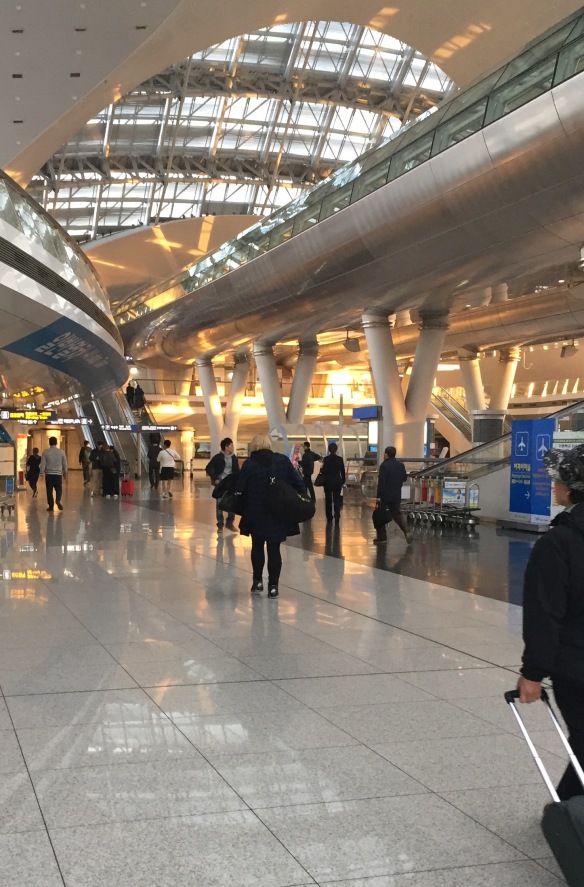
My Tara walking away

Random Photo:

image

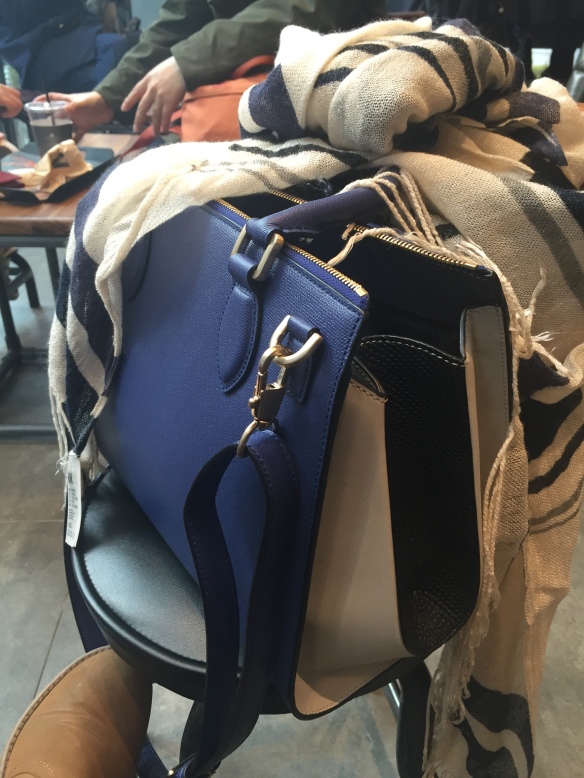
Oops! Handbag shopping in Seoul. Just could not resist

image

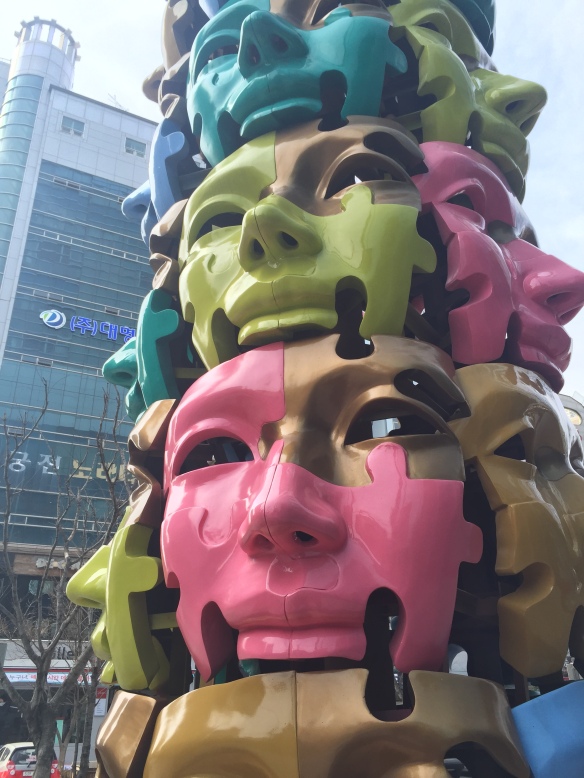
Street Art Down Town Ulsan


(Nagmaalpampoen) Guava and Pumpkin Roast

Nagmaalpampoen

Nagmaalpampoen

Nagmaalpampoen directly translated means communion pumpkin. In the olden days the chuch people had to travel from afar to get together for church. They specifically went “all out” for communion Sunday where they afterwards cooked and ate together. Later on, the Sunday meal still meant one almighty lunch, whether people had to travel or not to get together. I first had this pumpkin dish at a friend’s house (on a Sunday of course) when I was still a student. Years later when I still made my own recipe cards, I found the recipe in an Afrikaans magazine and it became one of my favourite special recipes. That collection of cards now got replaced by ipads and blogsšŸ˜‰ and somehow as we do, I stupidly forgot about this dish and haven’t made it in years. I still have my recipe box and will save it for my daughter.

My recipe cards!

My recipe cards!

I do not know what made me think of it again but a lightbulb moment later, I made it today for Sunday lunch (to which day and meal the recipe now belongs). The original recipe like they did in those days had tinned this, syrup and sugar that, so instead, I used fresh ingredients.

imageUse the following:

Pumpkin (unpeeled) in chunks

Peeled guavas cut in quarters

2 Cinnamon sticks

Sprinkle with olive oil and pumpkin spice. (I used a wonderful blood orange infused olive oil from Willow Creek and If you do not have pumpkin spice, use cinnamon and cloves)

250ml orange juice(I added apple juice with the orange because I had it)

125 ml butter

Bake in the oven until glistening, soft and the sauce is caramelised

If you like it sweeter, add sugar or Xylitol before baking.

Pumpkin and guava bake

Pumpkin and guava bake

I love cooking with fruit and the pumpkin I served it with roast leg of lamb baked with apple which a blogged about here.

Roast lamb with apple

Roast lamb with apple

Random Photo:

Art and sculptures at Delaire Graff Estate Stellenbosch Winelandsimage

Those figures are my idea of tranquility.

Hands

Hands

My absolute favourite and what a joy to see the original unexpectedly!

Tretchikoff at Delaire Graff

Trechikoff

Tretchikoff: Chinese Girl

Curry Butternut Soup and Spanakopita

Isn't she just lovely! Art at Tokara Wine Farm

Isn’t she just lovely! Art at Tokara Wine Estate

Today I start and finish with a random photoĀ because she is just too lovely to be last, and I like her shoes….

I recently ordered this curried soup and spanakopita combination in a restaurant in Hermanus (they did not even intend the two starters to be a combination and now it is my favourite pairing).Two dishes that has absolutely no relation or is not a known or even a usual pairing of dishes, but just the right two things to make it spectacular. For me at least.Of course since eating it, the usual obsession started about making it with my own changes.

Curry Butternut Soup

Curry Butternut Soup

For the curry butternut soup-( without quantities as it is just so easy you can just wing it):

Fry onions and garlic with curry mix and powders of your choice in butter/oil. Add chili flakes and add butternut and fry to incorporate the flavours.I also added pumpkin spice and grated orange rind for sweetness. Add vegetable stock and boil until soft.Ā Liquidise the soup and add a bit of cream to taste. I served it with a dollop of Greek Yogurt and added a slice of a filled jalapeƱo chili popper (left over form a previous meal) as garnish and drizzled with olive oil.

Curry Butternut Soup with Spanakopita

Curry Butternut Soup with Spanakopita

With that I served the spanakopitaĀ – a Greek spinach pieĀ  (with my own take on the filling) which is something I used to make regularly and then sort of forgot about it for a while, until now.

400 gr Swiss Chard spinach boiled in salt water and drained very well-press with a wooden spoon in a colander until it is properly drained

I mixed the spinach with:Ā 1 table spoon freshly grated ginger, 250 gr ricotta ( I proudly made mine previously and the method is here, but this time it was store bought ricotta), 150 gr cream cheese and 80 gr chopped pecans. Salt and white pepper to taste. Ā The ginger gives it a depth of flavour that worked so well with the curried soup.image

Cut filo pastry in long strips and roll a big spoon full in triangular shapes or round cigar shapes (close the ends by folding the filo in) and brush with butter. Bake at 180 to 200 Degrees C for about 30 minutes. Do not use too little filo as the filling can make the parcel burst open and you will have the filling spilling out. Serve with the piping hot soup! Crispy and great-if you heat it up the next day, just put it back in the oven to revive the crispness. Nice for ‘dunkin’ in that soup!image

Fae there on the other side of the world also made spanakopita and her recipe (filling) is slightly different from mine, and I am sure also delicious. It is always so intriguing that one does not see a dish for ages and then suddenly you see it all over. I am very much in a Greek food mood so will keep on trying more varieties of the same.

image

Random photo:

Thinking.....also at Tokara

Thinking…..also at Tokara

Arty window display-Busan Korea:

Window display in Busan-art in itself! Photo by Tara

Window display in Busan-art in itself! Photo by Tara

Well, at last I did a Cheese SoufflĆ©

image

I was always(still is) in awe of a soufflĆ©. Any kind which rises straight up from the rim of the dish/ ramekin. All I did not want to hear was the pfffeouffffff! of the thing deflating (my imagination of course). Well I did not hear that sound but it still sort of deflated, just after I took the photo’s. I think my base sauce was a bit too heavy so I will try to aerate the batter better next time as I absolutely ADORE the taste. I can just keep on eating it.

Baked Cheese Souffle

Baked Cheese Souffle

I am in a bit of a food slump lately. Living precariously through my blogging friend’s creations and no inclination to be creatively involved. Well, that is why we have blogs and bloggers. To keep us entertained and reading and dreaming. Thank you to my two loyal friends in blogging Mrs. Choux and Ahila for nominating me for the Wonderful Team Member Readership and Liebster Awards. Much appreciated and as is my habit, I shall have to take up my tools and bake you a thank you cake, which seems to be the only time I bake unless it is baking for national safety like I did here.Ā 

imageI followed the Cheese SoufflĆ© of Pomegranate Days and will change nothing, just concentrate more with the process next time. I read that the step where you cover the base and sides of the ramekin with parmesan, after brushing it with butter is important as it helps the soufflĆ© rising straight above the rim, upwards. That is the step I skipped and which I will not skip again next time as mine did not do the “straight up” thing.

You will need:

500 ml milk
80 g butter
5 ml Dijon Mustard
80 g cake flour
5 ml Ā nutmeg
65 ml grated parmesan cheese
500 ml grated cheddar cheese
30 ml parsley and basil leaves, chopped
salt and freshly ground black pepper
6 eggs, separated

Whip it up

Whip it up

Method:
Prepare 6 ramekins (soufflƩ dishes) by brushing them well with melted butter and thereafter sprinkling the bottom and the sides of each ramekin with the grated parmesan cheese.
Heat the milk.In a medium saucepan, melt the butter. Add the Dijon mustard and stir well. Add the flour and use a wooden spoon to stir the butter and flour together into a thick, smooth paste.
Using a whisk add 250 ml of the milk to the paste and continue whisking until the sauce is smooth and thick. Repeat with the remaining milk. Cook the sauce over a low heat for a 2-3 minutes to cook out the flour.
Remove the saucepan from the heat and whisk in the cheeses and the herbs. Once the cheeses are melted into the sauce, season the sauce to taste.Whisk in the egg yolks and set aside to cool.
In the meantime, in a clean dry bowl, whisk the egg whites until firm. Gently and lightly fold the egg whites, ā…“ at a time, into the base sauce. Take care to keep the mixture as light as possible.
Spoon the mixture evenly into the ramekins, filling them Ā¾ of the way up. Run your thumb around the edge of the ramekin.
Place the ramekins onto a baking tray and bake in a preheated oven at 190ĖšC for 25 ā€“ 30 minutes or until the soufflĆ©s are well risen and firm to the touch.
Serve immediately

Cheese Souffle

Cheese Souffle

Seeing that I have herbs & cheese going on here, this recipe will go straight to the June’s Cheese Please! Blog Challenge on Fromage Homage, one of my favorite reads.

Cheese Please!Blog Challenge

Cheese Please!Blog Challenge

Random Photo:


Artist unknown. I want to paint you...

Artist unknown. I want to paint you…

Same color palate in my ” front yard”.

Floating buildings in the mist. Cape Town

Floating buildings in the mist. Cape Town

Chinese Vegetables

It could have been a flower

It could have been a flower

I think bok choy is just a beautiful thing. I went to the Chinese Supermarket to buy Chinese Five Spice and I found fresh bok choy and white Chinese radish. I have never cooked with either. Ā Technically bok choy is part of the cabbage family but does not taste like cabbage at all. I should have bought two to keep one as decoration-just so pretty. I did a bit of reading up and a lot of the fried cabbage dishes also contain garlic and ginger and I already had those in the Asian meatballs I was making and did not want to repeat them again with the vegetables.Ā image Trim the bok choy stem, separate the leaves and rinse. I also halved the bigger leaves to have them evenly sized.Ā image Heat up a pan/wok with a bit of peanut oil and add soy sauce to the hot oil just before you add the vegetables, flash fry the leaves and toss fast. I find that tongs work the best. Do that for about 30 seconds and then add a splash of water to create steam and cover the pan. Steam for about 3 minutes and turn it over with the tongs in between. Add another splash of water if necessary to create steam. Plate and season with salt and a drizzle of peanut oil.image Let me tell you it tastes great. I also used half of the Chinese radish to stir fry with carrots and baby cabbage and the other I pickled.

Asian meat balls and stirfry

Asian meat balls and stirfry

Random photo:

Art

Man

Man


PICKLED PINK

Aside

Pickled Radishes

Pickled Radishes

I always wondered how the contestants on Master Chef could pickle all they pickle within one hour. I thought pickles had to sit pretty in brine or whatever for weeks to be just right .Well I was wrong. No suprise that I was wrong on that score as I only for the first time preserved guavas a year ago after putting it off for half of my natural life, because yet again I thought it would take lots of time and effort, which it did not.

Today I made a bon voyage lunch for my sister and her husband who is going for a week of 5 star holiday in Mauritius, awful I know….If she loved me she would have taken me with. Another first for me was to make Eisbein which is a robust German dish of smoked pork knuckle and which deserves a blog on its own. I did not have sauerkraut and wanted some pickles to go with the obligatory mustard and veggies for the Eisbein feast.

No hard work for these pickles

No hard work for these pickles

A bunch of big fat radishes lying around in the fridge ended up being just the thing to pickle and low and behold, ready in 10 minutes. I bought a bottle of Verjus which I have never tried before (a lot of firsts being tried out here!) and the label says:: “use instead of lemon juice or vinegar”, perfect for the radishes.image

Mix the following:

1 cup Verjus/Vinegar of your choice

1/2 a cup water

2t salt

2 T honey(I used ginger infused honey)

A bunch radishes sliced thinly

3 cloves garlic

Pickled Pink!

Pickled Pink!

Cook the first 4 ingredients for 2 minutes in the microwave or warm up on the stove top. Add the radishes and garlic to the liquid(do not cook again, the heat is just to melt the honey) and leave to cool down. Taste the liquid and adjust the sweetness if you have to. 10 minutes later you have pickled radishes! Pretty and pink. I will definitely use Verjus again, I like the gentle taste of it and can think of a lot of ways to enhance food with my newfound bottle of joy. If I do not have ginger honey, I will definitely add ginger to the normal ingredients as it just took it to another layer of taste.

Random Photo:

Miss you Tara! Starbucks all the way from Ulsan, South Korea.

My Tara to the right, Jeanri to the left.

My Tara to the right, Jeanri to the left.


All things Red

Baked figs and Blue cheese

Baked figs and Blue cheese

I am still in my red phase, or fig phase, don’t know which, which started with the red Afghan carpet I bought. I need very visually stimulating food and things around me and that is not a phase, it is just how it is.

I just put the blue cheese in the sliced figs with a sprig of thyme and baked at 180 until soft and gooyy. Green grapes and baked figs made a great salad in what is a hot summer in Cape Town.

Baked figs and ice cold green grapes

Baked figs and ice cold green grapes

Red post or not, this blue fig one will go to the Cheese, Please! April challenge featuring the blues.

Cheese Please!Blog Challenge

Cheese Please!Blog Challenge

We are doing short over-night road trips over weekends to the wine farms and surrounds to clear the brain and I always pick up fresh produce and cheeses along the way. I wish we had time for a longer break but alas, it will not happen now.

Ataraxia Wine Farm, Hemel&Aarde Valley

Ataraxia Wine Farm, Hemel&Aarde Valley

Figs will always remind me of the huge fig tree in front of our house when I started my school years in George, Eastern Cape. There was often a big juicy red fig in my packed lunch, which even then I could not wait to get my teeth into. Strange if you think that others had sweets or crisps and I wanted fruit, strange kid indeed. I am still strange, come to think of it.

Figs, Feta & Capers

Figs, Feta & Capers

This fig salad was made with baby spinach, sun-dried tomato feta and capers(my latest craze).

Baked Ricotta&Beetroot Pots

Baked Ricotta&Beetroot Pots

The funny red concoction happened when I adjusted my baked Ricotta Vegetable Pots Recipe to make baked beetroot and ricotta pots. Dark, deep red. Oh, and of course I added vintage cheddar to the beetroot mix. Great combination. Instead of pouring the ricotta mix over oven baked beetroot(drizzled with balsamic cream), I mixed the beetroot and ricotta mix with added vintage cheddar in a mixer to form a paste and then baked it in individual ramekins. Do NOT forget to put the lid on the mixer…ahem…uh, okay it took very long to clean the kitchen……

Random Photo:

Good night Cape Town

Lion's Head Cape Town

Lion’s Head Cape Town

Ricotta vegetable pots

Ricotta vegetable pot

Ricotta vegetable pot

I still can’t believe how easy it is, but I made ricotta cheese. WhoĀ would’ve thought! I always buy the stuff but when the March Cheese Please Challenge came along and I saw that ricotta is the Belle of the Cheese Ball in this round, I thought smugly, that’s easy! I use ricotta all the time. Until I read that I had to make it myself……and of course I can’t do THAT, Ā I have no “cheese making things” in my house. Sulking, I just fast read through the challenge and then saw how easy it is……..Still, there is always a possibility that I can bugger up an easy thing but alas, smooth, smooooothly it went and now you are talking to a cheese maker. A proper ricotta cheesemongermaker person! ( okay, not monger but still…).

Tools of the trade of a proper ricotta cheese maker person

Tools of the trade of a proper ricotta cheese maker person

I do not even have a muslin cloth so I had to borrow one from nowathome.Ā The rest as they say, is history. Of course we shall eat ricotta now in and on everything just because!

Bring 1 liter of full cream milk to the boil and add the juice of one lemon. That is about the sum total of the most difficult part of the process……

Watch intently for 10 minutes because you are cheese proud, very

Watch intently for 10 minutes because you are cheese proud, very

With huge flair (because you are a successful ricotta maker now), gather the family together to watch as you drain the whey in a colander, lined with a borrowed muslin cloth and give or take 15 minutes later, Ā gather the cheese together and lightly squeeze to drain Ā the excess fluid. Seal in an airtight container until use. Huh, WHO would’ve thought?! Remember to go back to the fridge at least three times to stare at your cheese creation in wonder. I shall now change my middle name to ricotta, I am so chuffed!

image

What to do for the veggie pots: image Grease ramekins and fill with cooked vegetables of your choice. Use 1 cup of ricotta, two eggs, and one cup of cheese mixed together and salted to taste, to pour over the vegetables. Top with more grated cheese and paprika and bake at 180 C until set and golden.It also works well as a quiche filling/for baked spinach tart.

Cheesy!

Cheesy!

Random photo:Ā 

On a recent business trip I was offered a room upgrade as the TV (which I don’t watch) and the WIFI (which I do need) did not work in the room I booked. Look what waited for me…….friendly people indeed. I ever so politely accepted their offer.

Morrell's Farm House Suite

Morrells Farm House Suite

Butternut and Fried Haloumi Stack

I had this very interesting meal at an open air restaurant in Hermanus recently. Kebabs on a nifty table top barbecue thingy which I wish I owned, with a butternut stack side dish.

Restaurant meal with nifty Coal BBQ gadget

Restaurant meal with nifty Coal BBQ gadget

Nevertheless, I had to recreate the butternut and haloumi stack at least, seeing that I am not allowed to do a table barbecue in an apartment…..

Butternut disks

Butternut disks

I simply cut the butternut in disks and fried it with pumpkin spice in butter.

Lovely Haloumi

Lovely Haloumi

The haloumi can be baked but I dusted the cheese with flour and fried it in shallow oil. Do not over fry as you will end up with rubbery cheese.

Stack the lot!

Stack the lot!

Stack the lot and top with fresh rocket and drizzle with lemon juice. Lovely with anything or lovely on its own!

My version of the stack with chicken trinchado

My version of the stack with chicken trinchado

Random Photo:

My blues!

My blues!

My sister blogged about the Milnerton Market on nowathome and we walked (and talked) the market from top to bottom last weekend. Of course I had to add to my collection(s) by descending on the white and blue table. Very happy with my loot!

Miniature porcelain flowers

Miniature porcelain flowers

Stuffed Mushrooms

What with February and the month of Valentine almost on it’s head, I think a romantic table setting is in order. Time she is a flying!

Table setting at Morrells Farm House, Johannesburg

Table setting at Morrells Farm House, Johannesburg

I bought a piece of Colby Cheese at Hillcrest Berry Orchard, Stellenbosch recently and had to read up about this gentle creamy cheese as I did not know it at all. It is very similar to cheddar but it does not undergo the cheddaring (I don’t even know if this is a word) process leaving it softer, moister and milder than cheddar. Perfect for what I had in mind.

Colby Cheese, Hillcrest Berry Orchard

Colby Cheese, Hillcrest Berry Orchard

Use:

Big brown mushrooms- top and tail them. The stems were so big that I diced and fried it separately in butter for garnishing.

Frozen creamed spinach or make your own

Onion

Feta cheese

Colby Cheese or any cheese of your choice

image

Fry onion in butter, mix in the thawed creamed spinach and heat through. Add feta and Colby cheese, salt and pepper to taste. Scoop into mushroom “shells” and sprinkle with the fried mushroom stems and more Colby cheese, of course. Bake in a warm oven until the mushrooms are cooked through and serve as a mains with salad or as a sides. I topped the lot with a bit of tomato relish for a bit of colour.

Stuffed mushrooms

Stuffed mushrooms

Feasting!

Kingklip and stuffed Mushrooms

Kingklip and stuffed Mushrooms

My one and only post( it seems) for the too busy February is being submitted to the Cheese Please! monthly because I discovered the new Colby Cheese…..just because!

image

Below random photo: My office

I am a keen supporter of designer Michael Chandler in Cape Town with his beautiful shop, Chandler House around the corner of mine. His phrenology vases light up my day in my office and I constantly fill them with all sorts of things. Funny how the facial expressions on the identical vases change depending on what I fill them with. The lady with the flower head looks so feminine compared with the nutty guy. Anything just not to see those files……as if…..

Flower head and picking brains?

Flower head and picking brains?